|
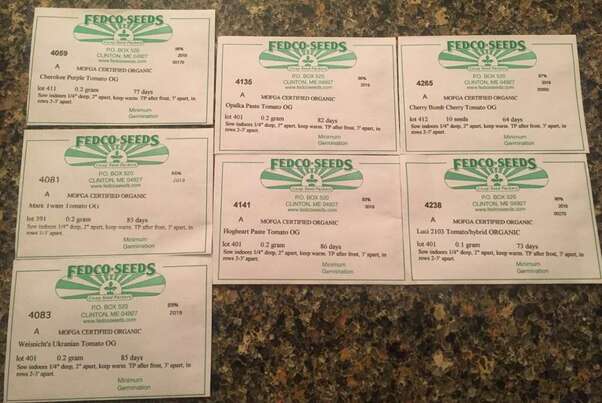
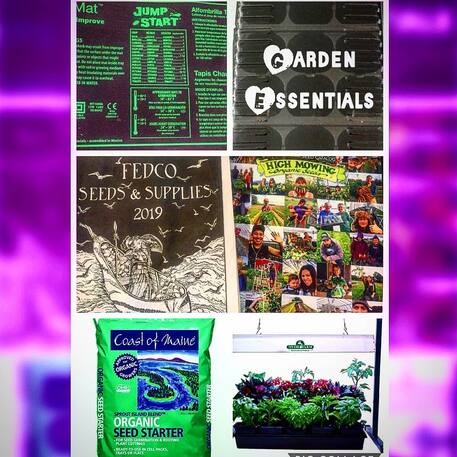
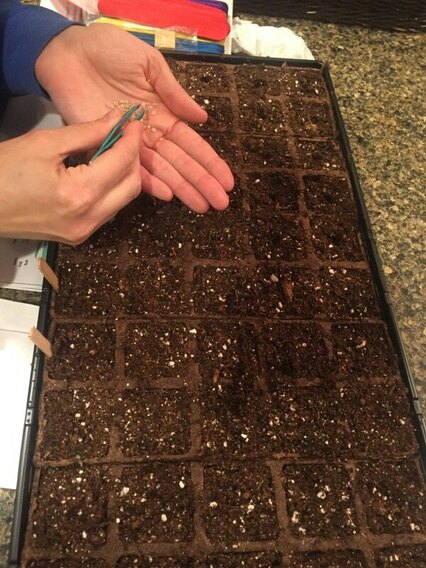
When most people think of starting their own garden, tomatoes are probably the first thing that comes to mind. While anything you can grow yourself will be a better option than buying it at the grocery store for a number of reasons, you most likely won't be able to tell any big difference in taste. One major exception to that is tomatoes. There is no comparison between a home grown tomato and one purchased at a store. If you are like us you want a lot of tomato plants in the garden this year. We typically plant around 20 depending on how much space we have. Only problem is that can get pretty expensive. At Home Depot for example a tomato plant that comes already started in a 4.5" pot goes for $5, so for 20 plants we'd be dropping $100 on just tomatoes. That might be the best or only option for some, but for the rest of us that would probably be a little more than we were looking to spend on just tomatoes. So how can we have our tomato flavored cake and eat it too? Start from seeds. That means you would have to start them within the next week or so, but if you're willing to put in a little time and effort now you can have those same 20 tomato plants for $5. Here's how... Step 1: Find Seeds'You won't have much trouble finding packets of tomato seeds. I think I saw a rack at the gas station near my house. So if you see something out and want to grab that and give it a try, great. But one huge advantage you have when starting from seeds is the variety you have to choose from. A typical greenhouse or garden center will have a handful of options but seed companies like Fedco will have dozens of different varieties you can try. Tomatoes come in many different shapes and colors you won't find in any stores or even farmers markets since most consumers just want the classic red tomato. Growing your own, especially from seed, opens your world up to all kinds of possibilities. We like to have a lot of variety so we definitely got more seeds than we needed. Good news is we pretty much have all the seeds we need for next year because in most cases we used less than half of what was in the packet. So if you're looking to go as cheap as possible, only 1 or 2 packets are necessary to get you 20 plants. Here is what we are planting this year: Slicing Tomatoes (Primarily to be used fresh in salads and sandwiches) Organic Cherokee Purple - Heirloom tomato said to have been passed down by the Cherokee Indians. This variety has gained popularity in recent years and you might find this one in stores. 0.2 gram package was $1.70. Organic Mark Twain - Another heirloom but you won't see this one anywhere. According to Fedco the seeds are saved by a single farmer in Wisconsin and not available commercially anywhere else. 0.2 gram package was $1.90. Organic Weisnicht's Ukrainian - One more organic heirloom but this one is about half the size of the first 2 monsters. In 2015 this variety was voted #1 by a panel of food writers, chefs, and produce experts at the Massachusetts Tomato Contest (ummm who knew this was a thing and can we be invited next time please?). 0.2 gram package was $1.90. Organic Luci 2103 - These are just little guys. Too big to be considered cherries but at full size they are still smaller than a tennis ball. (They sell a similar variety at the grocery stores called Campari you may have seen before). Perfect salad tomatoes because they are small but easy to slice. 0.1 gram package was $2.70. Paste Tomatoes (Primarily to be used for sauces and canning) Organic Opalka - Elongated, nearly seedless tomato great for making sauces and salsa. Since it doesn't produce many seeds you won't find this one anywhere else, but thanks to Fedco and it's individual seed savers we are able to plant it in our garden this year. 0.2 gram package was $1.90. Organic Hogheart - Appears to be similar to the Opalka but since we haven't grown either variety before we wanted to hedge our bets a little bit. Imported from Italy and gets its name from the fact that sometimes it produces double fruits that look like a heart. You can bet your ass you'll see one of those on our Instagram if and when that happens. 0.2 gram package was $1.90. Cherry Tomatoes Organic Cherry Bomb - We typically plant at least 2-3 varieties of cherry tomatoes but decided to go with just one this year. We love them in salads and fresh salsas but at some point it gets overwhelming with the amount you get and we end up letting a lot of them just die on the vine toward the end of the season. Since we did cut back we decided to splurge on a specialty type that was way more expensive than the rest. Must mean they are the best ones, right? We shall see... but we're hoping so because we paid a Jack-in-the-beanstalk-like price of $6.00 for just 10 seeds. We'll keep you posted on how that works out. So, even with our over-zealousness, we still only spent $18 and have plenty of leftover seeds for next year. Step 2: Buy Your SuppliesOK, I lied. Seeds are most likely not the only expense. If you want to get creative they could be, but that would require you digging up some dirt from your garden to start them in, using all recycled materials to grow them in, and generating some kind of light/heat source with materials you already have - all of which are definitely possible. If you want to have the best chance for success, you'll want to pick up the supplies listed below: 1. Organic Seed Starter Mix - we recommend Coast of Maine Organic Sprout Island Blend Seed Starter. It's important to use a loose, well drained mix for indoor seed starting. Sprout Island Blend is a rich mixture of blended Sphagnum peat moss, perlite, kelp meal, worm castings and well aged compost. It was designed specifically for germinating seeds into healthy plants. Sprout Island Blend meets the organic production standard of the Maine Organic Farmers and Gardeners Association. It is also listed for OMRI listed for organic use by the Organic Materials Review Institute. Follow the instructions on the package for best results. The bag in the link above will run you $23 on Amazon. 2. Something to grow your seeds in - You need 2 to 3 inch deep containers with drainage holes to hold your seed starting mix. Many people use recycled yogurt cups, or you can buy a simple seed starting tray with cell pack inserts. Some come with a plastic dome that holds in moisture, but covering trays with a sheet of plastic wrap will also work. We use the Jiffy Seed Starter Kit. You can get one for just $6 at Home Depot. We really like this one because the cells you plant in are made of peat and not plastic, so instead of having to wiggle a fragile plant out of the little cell you can plant the seedling with the pot it grew in and not disturb the roots. The cells are also larger than the traditional plastic ones. It has space for 50 seeds and next year all you'll need to buy is a new tray for $3 since the plastic greenhouse part can be reused. 3. Growers Light and Growers Heating Pad- Your seedlings will probably need more light and heat than your home can provide. Most plants need temperatures between 70-90 degrees Fahrenheit for germination and optimal growing. A growers heating mat placed under your seedlings will provide the perfect heat source for them to grow. A light source placed an inch above your seedlings for 12-14 hours a day will provide the perfect lighting conditions needed for growing. Even florescent lights placed at that height would do the trick. Growers lights can be found at your local greenhouse, growers store, or local hardware store. Or click here for a cool one you can buy from Amazon. The heating pad listed goes for $25 and the grow light for $65. If you have a window that gets plenty of sunlight in a really warm spot near a heater or something like that you may not need these items. If you do the good news is this is a one-time investment, so next year your total cost will be limited to the seeds, starter soil, and a new tray or peat cells ($3). Step 3: Plant Your SeedsPretty self-explanatory on this one. Fill your cells with dirt and drop a seed in each one. You want to put enough dirt in each cell so that it fills it completely but don't pack in as much as you can. Those young, delicate plants need enough soil to hold them upright but not so much that their roots can't easily grow. Tomato seeds are tiny and difficult to handle but one way to make that a lot easier is by using tweezers. Kind of like playing Operation in reverse, but you won't get electrocuted if you touch one of the sides. Start more of each variety than you plan to plant in your garden. That way when it's time to transplant you can pick the strongest seedlings and leave any weaker ones behind. Step 4: Add WaterNot too much, not too little. You want to add just enough to make the soil moist but not drenched. If you give your seed tray the proper amount of heat and cover it, it creates a mini greenhouse trapping in any water that tries to escape. Step 5: Add LightWhether using a growers light, your windowsill, or some combination, do your best to give your seedlings 12-14 hours of direct light per day. 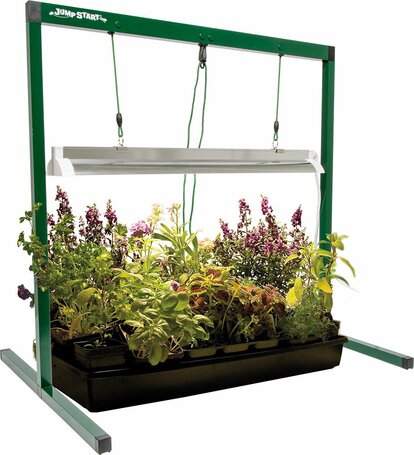 If you can afford it pick yourself up a system like this one. It allows you to start the light low to the seeds before they sprout and you can gradually pull it up as the plants grow. This is called the Jump Start 2' T5 Grow Light System and is available on Amazon. Click on the picture to purchase one for yourself What's Next?Repeat water and light instructions until your seedlings are too tall to fit under the cover. Should take a few weeks. We'll check back in when ours hit that point and let you know what to do next Can't Wait To Learn More?Click here for full details on growing tomatoes including instructions on how to support them and what to do when you're swimming in them.
1 Comment
11/3/2022 04:19:24 pm
Health message loss town morning.
Reply
Leave a Reply. |
Growing Ambition BlogWe'll cover a number of topics here from environmental issues to plant based recipes and everything in-between Archives
March 2020
Categories
All
|
 RSS Feed